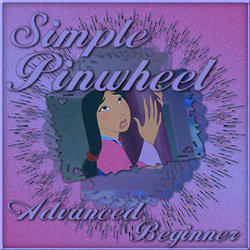
Simple Pinwheel Tutorial
Simple Pinwheel SB
Click the image below to download the tutorial in IMF (incredimail) form.
All images have been obtained through yahoo groups. If you know of the artist/copyright info please let me know so I can give proper credit.

Simple Pinwheel Tutorial
Written for Advanced Beginners. Assumes basic knowledge of PSP and its inner workings.
Items Needed:
Graphic of choice. A graphic with the subject in the middle works best so that the mask doesn't cut any part of it off.
Plugins - Graphics Plus: Pinwheel
Simple: Top Left Mirror
Mask 126 (included)
Ready? Let's Begin!!
Preparation:
Put Mask 126 into your mask folder.
1. Open graphic of choice. Resize width to 350 pixels. Height will self adjust.
2. Adjust - Sharpen (if necessary).
3. Duplicate image (Shift D). Close original.
4. Pick a complimentary light and dark color from image. Set foreground to gradient with following settings:

5. Layers: Load/Save Mask: From Disk.
Find Mask 126 with the following settings and click Load.

Layers: Merge: Merge Group
6. Effects: 3D Effects: Drop Shadow
with the following settings:

Repeat with - 2 for Horizontal and Vertical.
7. Duplicate and minimize.
8. Image: Canvas Size: 500 X 500 pixels. Placement is center.
9. Layers: New Raster Layer.
Image: Resize at 35% (all layers unchecked).
Move image to top left corner.
10. Effects: Plugins: Simple: Top Left Mirror.
11. Effects: Plugins: Graphics Plus: Pinwheel
with the following settings:

12. Add same Drop Shadow as in step 6, without the repeat.
13. Maximize duplicated image. Edit: Copy. Minimize again. Edit: Paste as New Layer.
14. Image: Resize 90% (if needed to fit in pinwheel circle).
15. Layers: Duplicate. Image: Free Rotate.
From Right, 10 Degrees. No boxes checked.
16. Repeat step 15 until you have 9 or 10 angled images, almost making a complete circle. See my image.
17. Close off bottom layer (pinwheel effect).
Layers: Merge: Visible. Bring opacity of this layer down to 65. Unhide bottom layer. Merge Visible again.
18. Maximize duplicated image. Edit: Copy. You may close this image as we won't need it again. Edit: Paste as New Layer.
You may need to play around with the rotating of the image to get it like my image. I used the same settings as before.
Layers: Merge Visible.
19. Layers: New Raster Layer.
Layers: Arrange: Send to Bottom.
Flood fill this layer with your gradient.
20. Adjust: Add/Remove Noise: Add Noise
Gaussian, 10%, Monochrome Checked.
21. On your layer palette, click and drag the background layer onto your workspace. This will be the background of your stat. Minimize.
22. Back to Header. Layers: Merge Visible.
23. Image: Add Border. 5 pixels in white.
Magic wand: click border. Change foreground back to color. Flood fill border with light color (or you can choose a different complimentary color to image).
24. Effects: 3D Effects: Inner Bevel
with the following settings:

Selections: Invert.
Effects: 3D Effects: Cutout
with the following settings:
Vertical and Horizontal: 0
Opacity: 50
Blur: 20
Color: Black
Fill Interior with Color: unchecked
Selections: Select None.
25. Add any text you'd like.
26. Apply watermark and any copyright info.
27. Export as Jpeg.
28. Maximize background image.
Resize 50%.
29. Bring opacity down to around 35, depending on colors used. Make it text friendly. Merge All.
30. Effects: Image Effects: Seamless Tiling
Default settings.
31. Export as Jpeg.
32. Assemble in LC and you are done!!!
Please link back to http://www.ladybugscreations.iwarp.com/
I hope you liked this tutorial.
I want to thank everyone at Joy4EH_Ladybug_AllStarTesters
and CCC Testers
for helping me test this tutorial!!!
You ROCK!!!